How to Use an Electric Tiller: A Complete Guide for Gardeners
An electric tiller can make garden prep fast, easy, and efficient—especially for small spaces. This complete guide shows you how to set up and operate a tiller cultivator electric, with practical tips for getting the most out of your YERYORK garden electric tiller.
Whether you’re preparing soil for planting vegetables, refreshing a flower bed, or managing a small backyard, an electric tiller is the tool you need. Compared to manual labor, a garden tiller significantly saves time and energy while ensuring even soil texture.
In this guide, we’ll walk you through how to prepare, assemble, and operate an electric cultivator, using the YERYORK model as a practical example. If you’re looking for an affordable and effective way to start gardening, this could be the best cheap garden tiller for you.
1. Preparation Before Tilling
Proper preparation helps ensure safe and effective operation of your electric tiller and cultivator:
- Clear the Area: Remove rocks, wires, roots, or other obstructions that may damage the blades.
- Check Your Power Source: Use a grounded extension cord rated for outdoor use, ideally with a GFCI outlet, to operate your tiller cultivator electric safely.
- Wear Safety Gear: Gloves, protective glasses, and sturdy shoes are highly recommended. Tie up long hair to avoid getting it caught in moving parts.
- Avoid Moist Conditions: Never use your electric cultivator in wet or rainy environments to prevent electric shock or damage to the motor.

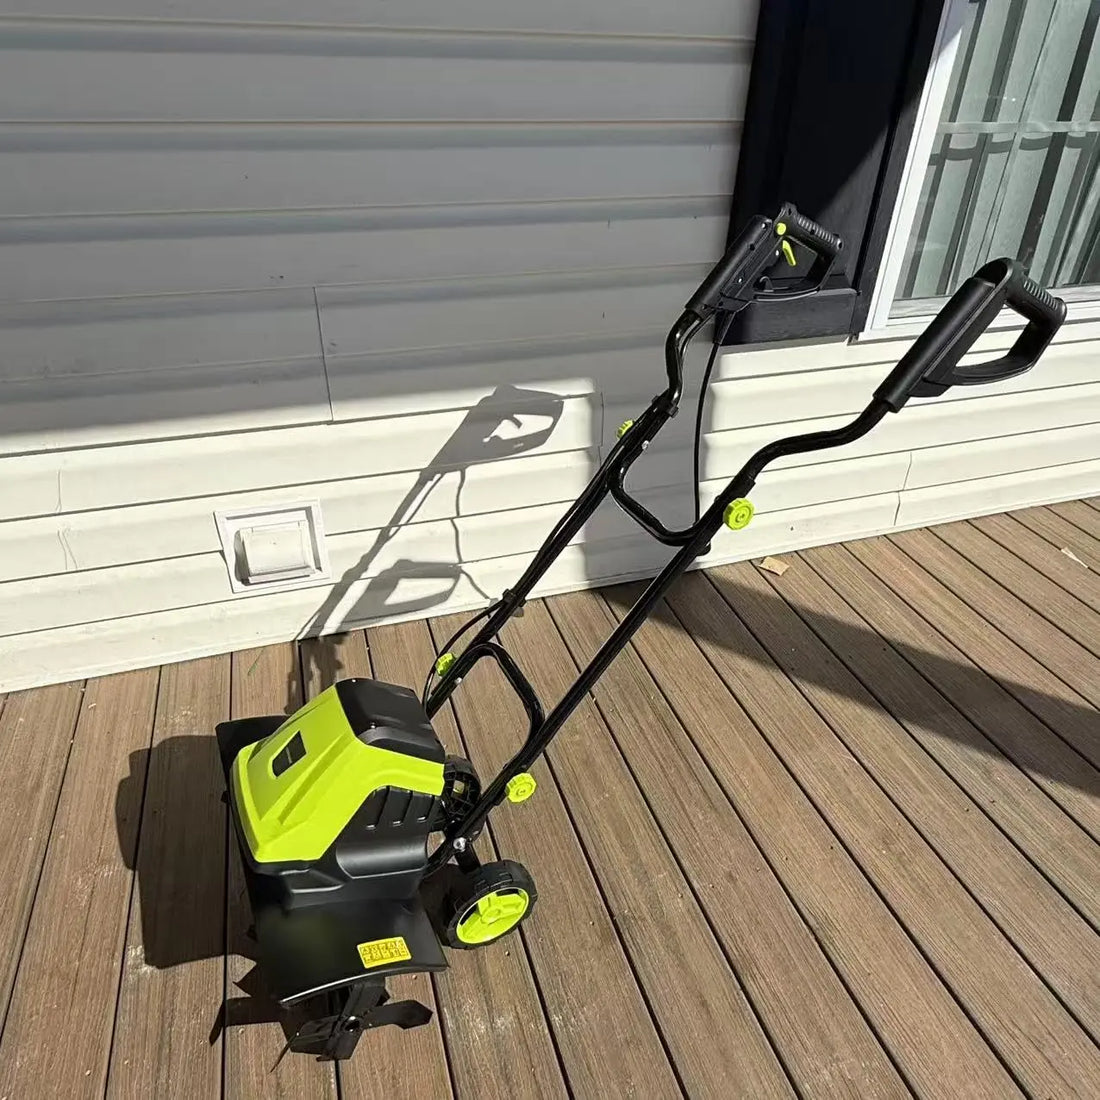
2. Assembling the Electric Tiller (Detailed Instructions)
The YERYORK electric tiller is designed with user-friendly modular components, making it easy to assemble even for first-time garden tool users. Based on the official operator’s manual (View Full PDF Manual Here), here is a detailed step-by-step guide to assembling your garden tiller safely and correctly.
1. Unpack and Check the Components
After opening the box, verify that all parts are included. The standard YERYORK package should contain:
- Electric tiller main body (with motor)
- Upper, middle, and lower handle sections
- Carriage bolts and wing nuts for handle assembly
- Two wheels and wheel caps
- Cable clips
- Operator’s manual

2. Assemble the Handle
- Step 1: Insert the lower handle section into the main motor housing.
- Step 2: Connect the middle and upper handle sections using the provided bolts and wing nuts.
-
Tip: It’s helpful to have a second person assist in holding the handle steady while tightening the bolts.
🔧 Important: Always assemble your electric cultivator with the power unplugged and all parts completely still.
3. Install the Wheels and Adjust Tilling Depth
The YERYORK tiller cultivator electric features adjustable wheels with four height settings that determine tilling depth:
| Position | Description |
| 1 | Transport mode (no tilling) |
| 2 | Shallow tilling (soft soil) |
| 3 | Medium tilling (user-controlled) |
| 4 | Deep tilling (maximum depth) |
- stall wheels: Insert the wheels into the rear axle and secure with the included metal pins.
- To adjust depth: Pull out the locking ring, rotate the wheel to the desired position, then release to lock it in place.
4. Secure the Power Cord
- Use the included cable clips to run the power cord neatly along the handle;
- Ensure there’s some slack near the plug to avoid tension during operation.
Proper cord management prevents tangling or accidental unplugging while operating your electric tiller and cultivator.
Pro Tips
- Always assemble and adjust your tiller before connecting to power.
- If this is your first time using a garden tiller, do a test run on soft grass or loose soil to get a feel for movement and grip.
3. Operating a Tiller Cultivator Electric
✅ Starting the Machine
- Place the tiller on flat ground and ensure the switch is off;
- Plug in the machine, then press both the safety button and start button to begin operation.
✅ Tilling Technique
- Firmly grip the handle and gently push the tiller forward;
- Start shallow for compact soil and gradually increase depth;
- If you encounter resistance like roots or stones, stop the machine and inspect the tines.
✅ Tilling Tips
- Don’t till the same spot repeatedly to avoid soil compaction;
- Add compost or fertilizer before tilling for even mixing;
- After use, unplug the machine, clean off debris, and store it in a dry area.
The YERYORK electric tiller is not just easy to use—it’s also designed for budget-conscious gardeners. With solid performance and a friendly price point, it stands out as one of the best cheap garden tiller options for beginners and small yard owners alike.